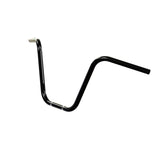
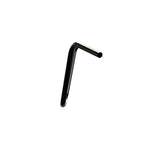
Fits Harley-Davidson Street 500, 250cc-400cc Metric Bikes & Classic British. See below for fitment list.
- Made in Australia
- Rust-Free Stainless Steel
- Durable High-Gloss Black Power Coat
- Anti-slip Knurls
- Usually Requires Extended Cables
- Free Shipping Australia-Wide
Awesome Street Appeal
Want to stand out? Hang 'em high with a set of BarCraft Old School Ape Hangers. The pinnacle of retro cool, our 13" Old School Apes are an authentic replication of Handlebars used on 1960’s Choppers.
Using a wider-spread rise and a little extra pullback than traditional Ape Hangers, these bars feel large and comfortable in your hands and look perfect on a classic or vintage styled chopper. Simply install a set on your ride, and you'll have instant, old school street appeal.
Built to Last You a Lifetime
Ever had your chrome parts rust away to look like junk? Not a problem with us. Our handlebars are Made right here in Australia using only premium grade, heavy-walled 304 Stainless Steel.
Precision bent & power coated in an Ultra Durable, High-Gloss Black Finish. Our Stainless Handlebars will never rust or pit. Go stainless, and never deal with rust again!
Relieves Back & Shoulder Pain
It's true. Back & shoulder pain will ruin the fun in your riding. Our bars have been optimised for rider comfort, making all day rides a breeze.
Higher Bars not only raise your back more upright, but bring the bars closer to your body. This relieves pressure from your lower back, prevents slouching, and eliminates causes of back & shoulder pain. The heavy-walled 304 stainless steel is thicker than OEM handlebars, increasing strength & reducing vibration.
Knurled for your Safety
Don't Compromise on Safety. Our Non-Slip Knurled Clamping area provides 10x more Grip than smooth Handlebars. Don't risk your bars slipping with inferior products, insist on BarCraft.
Fast & Free Shipping
Free, prompt shipping to your door for a hassle-free experience!
FITMENT
Below is a list of all compatible motorcycles.
If your bike does not appear on this list, you may be viewing the wrong product. Click Here to see Full Fitment Lists.
Installation Guide
Make sure to consult your bike manual or riser specifications for detailed instructions on your motorcycle's make and model.
Following removal of old handlebars, ensure to clean the threads on your riser clamps and bolts. Inspect for damage.
Apply loc tight or other thread compound to mounting bolts before re assembling.
Tighten riser bolts in an X-pattern until the riser clamps are tightened evenly. (e.g top left, bottom right, top right, bottom left.)
Use a torque wrench to tighten clamp bolts to the torque specified by the OEM riser manufacturer.
Use a feeler gauge to ensure that there is at least 0.5mm of clearance between the base and cap of the riser clamps. They will not clamp the handlebar properly if the cap is pressed hard against the base.
Check that electrical wires & control cables are routed appropriately, with enough slack at full turn. Use cables ties to secure any loose wires.
If you are unsure of how to use the tools required in the above instructions, please consult a motorcycle service professional.
Legal Height Disclaimer
Check your local laws regarding the maximum legal height of handlebars for your motorcycle. Handlebars not within legal limits are intended for show purposes only, and are not for use on public roads.


